WordPress which is one of the most widely used Content Management System comes with a lot of useful features by default.
However, every beginner wishes to add additional features and functions which can be achieved with the help of Plugins.
If you are a newbie who want to start a Blog or looking to Install a WordPress Plugin, this guide will take you through 3 different ways of Installing a WordPress Plugin.
How to Install a WordPress Plugin? [3 Different ways]
You can Install a Plugin in multiple ways given below.
Installing a Plugin by Search from the Plugins page.
Installing a Plugin by upload from the Plugins Upload Page.
Installing a Plugin though FTP.
Installing a Plugin by Search from the Plugins Page
This method allows you to install only the free plugins available in the WordPress Repository; In order to Install the desired Plugin, follow the steps mentioned below.
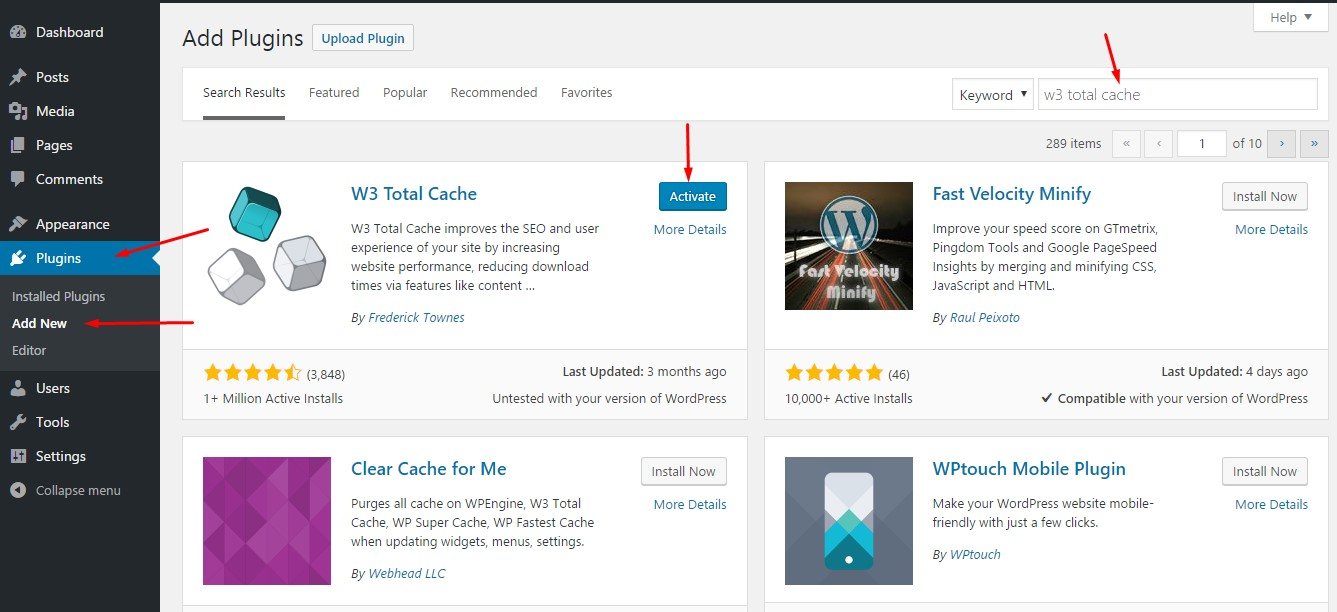
Locate the Plugins tab, and click on Add New which opens the Plugins Page.
Type in the name of the Plugin you want to Install in the Search Box.
After the complete search, Click on Install Now
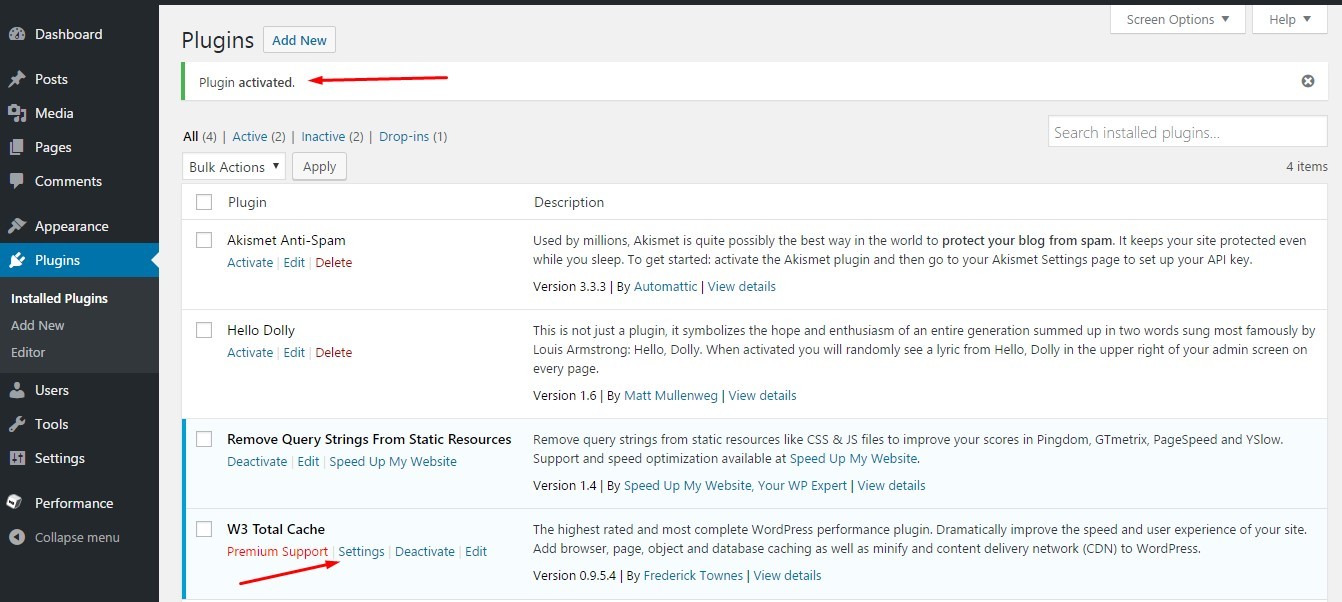
The above step allows WordPress to Install the required plugin files from the Repository, Click on Activate.
The successful notification of the Plugin Installation and Activation process is shown by “Plugin Activated”.
Now you can configure the settings for the plugin to run accordingly.
Installing a Plugin by Upload from Plugins Upload Page
This method is applicable for Premium Plugins or Plugins from third party sites, since these plugins are not listed in the Plugin directory, it cannot be Installed using the Search Method.
This method requires you to download the plugin from the source after which the following steps should be performed.
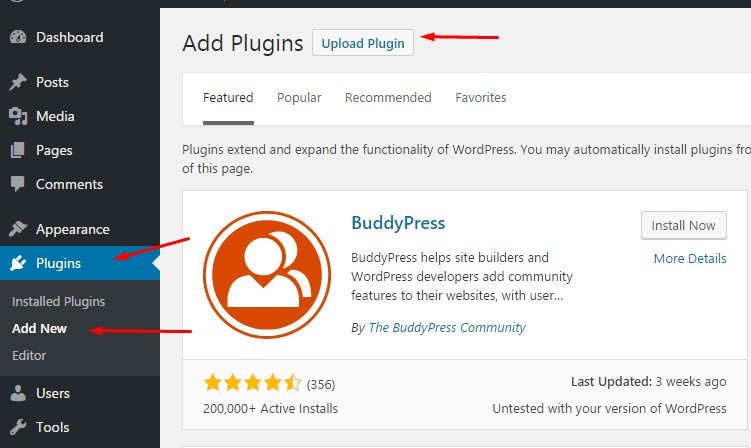
In order to Install the Plugin head over to plugins tab and click on Add New.
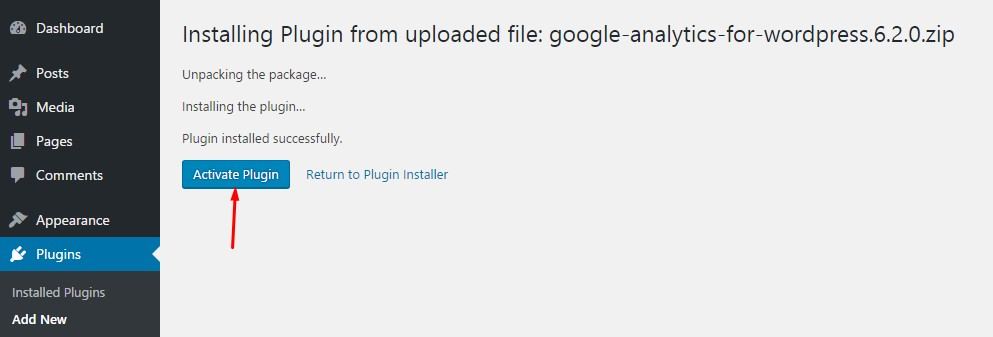
As shown in the screenshot below, click on Upload Plugin that allows you to upload the plugin file ( zip format).
3. Upload the Plugin from the source and click on Install.
4. Once done, you can activate the Plugin by clicking on “Activate Plugin”
Finally you have successfully installed and activated the plugin and can now configure the settings for the plugin to run accordingly.
Installing a Plugin through FTP
If you’re just starting with your Blog or a website, It’s recommended that you Install the Plugin using the above 2 methods, since the method of FTP sometime causes unwanted errors.
However, If you’ve got some experience handling the website, you can definitely try out with the FTP method. (It’s always recommended to keep a backup of your website, you can check out the list of Best Backup Plugins for WordPress)
Coming to the Installation of Plugin through FTP, It requires an FTP Client such as Filezilla. You can access your Host through the FTP Client which requires you to have a username and password, if you don’t have the credentials you can ask your Web Hosting Provider.
After logging in, you can locate the plugins folder by following the path /wp-content/plugins. Extract the downloaded plugin on your computer followed by uploading the extracted folder at /wp-content/plugins.
Once done, click on the Plugins tab present on the left hand side of your WordPress Dashboard, As shown I have installed the SEO Plugin by Yoast, Click on
Activate and configure the settings of the Plugin accordingly.
Final Thoughts
I hope this guide will help every beginner to Install a WordPress Plugin. If you come across any error or issue, Let us know in the comments below.